Everything is functional, but what about sounds? While you can put in sounds, there aren’t any user-friendly Besti SDK tools to mostly automate the process for you.
These are coming very soon, and as soon as the tool is ready this guide will reflect that.
For now, the only way you can make sounds is through a basic audio source. Audio sources are programs that play a noise from a location in your scene.
Let’s add a squishy noise on every thrust. Start by creating an audio source by right-clicking on the Hierarchy tab and choosing audio –> audio source. This will create a new object called Audio Source.
Position this audio source near where they are interacting with one another. I’m putting mine right here.
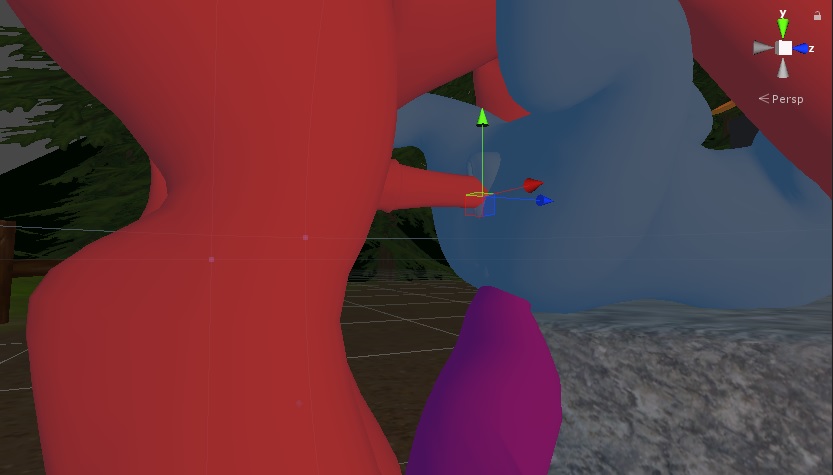
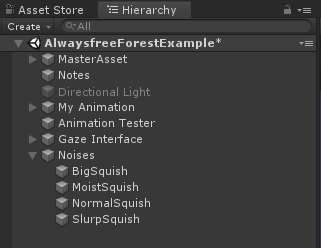
Let’s duplicate and label these so we know which ones are which. Let’s also put them inside of a single object so we can keep them organized. It should look like this:
Now each one needs to be configured as a 3D audio source. We can do that by selecting all of the audio sources in the hierarchy and then adjusting each one to be set up like this in the inspector:
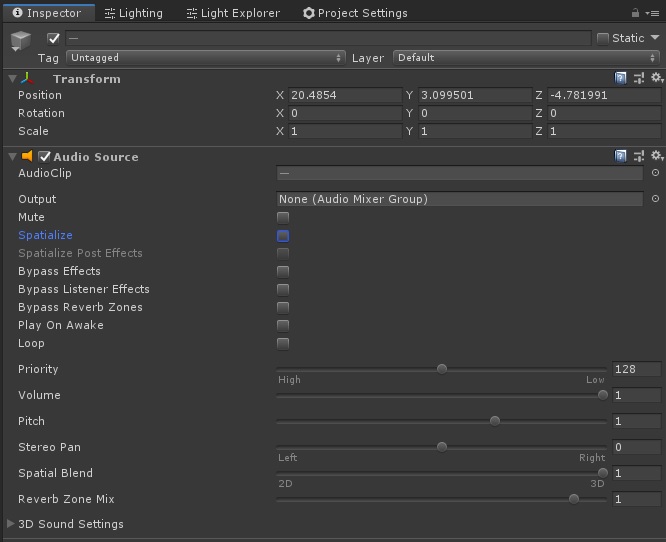
Note that “Play On Awake” has been unchecked, and “Spatial Blend” has been moved over to 3D. Otherwise the defaults are fine.
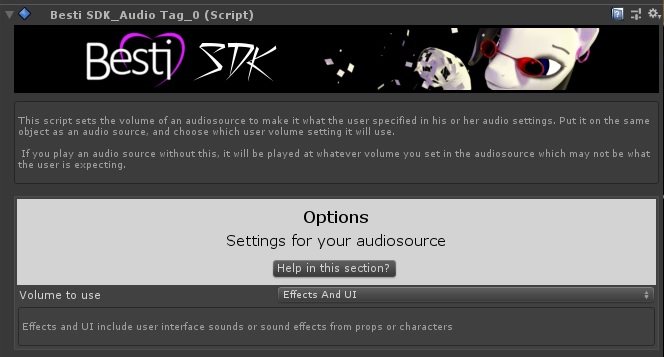
We can use a Besti SDK tool to specify which audio slider this should respect. In Besti X, users can independently adjust ambient sounds, sound effects, and character voices. Wet noises would be a type of sound effect. Add the tool “BestiSDK Audio Tag” to each audio source, and set the “Volume to use” dropdown to “Effects and UI” like so:
Now we can use the Animator Events tool on one of the characters to connect these Audio Sources to events we can call from within an animation. Head to the main controller one (Top Character in the example’s case) and add an event for each noise in the Animation Events section. We want to set each one to tell the audio source to play. It should look like this:
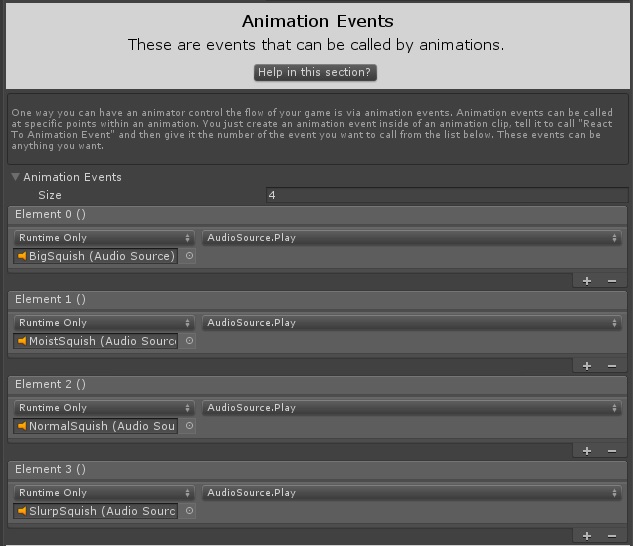
Now we have associated a sound called “Big Squish” with 0, “Moist Squish” with 1, and so on. How do we call these? Easy! We need to create some events within the animations themselves, and we do that with the “Animation” tab in Unity.
If you don’t have an Animation tab, add one through Window –> Animation –> Animation. To get it to show your animations, just click on the Top Character (the one with the Animator Controller.) Doing so populates the Animation window with all of the animation clips this can do.
The animator looks like this when it has loaded in all of the animations.
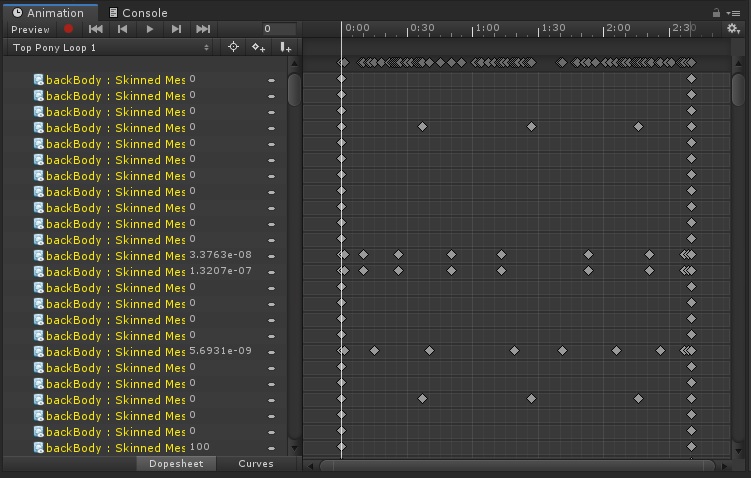
That’s a pretty scary interface! Thankfully all we care about are 2 things: The animation dropdown that shows all of the animations in the controller, and the timeline.
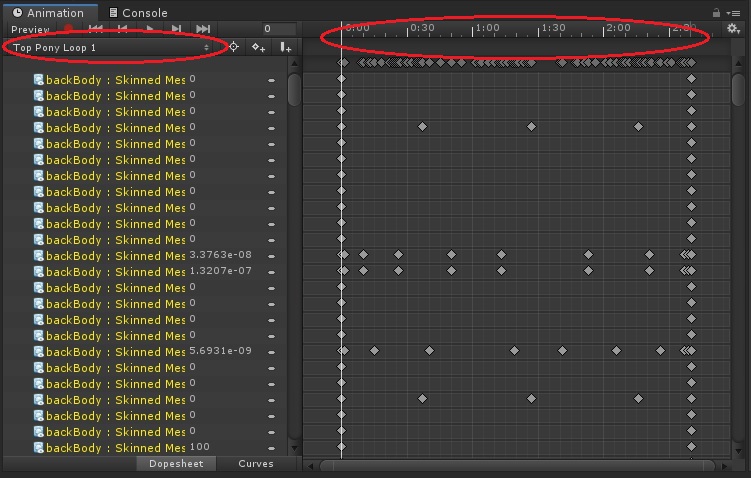
The circled item on the left is the animation dropdown can switch between the various animations in the controller. In this case, it can switch between the 7 animations that make up our top character’s animation.
The circled item on the right is the timeline of the animation. If you click and drag where the numbers are, you will preview the animation in the “Scene” tab.
The first clip that seems to need a noise is “Top Pony Transition from 1 to 2,” and that looks like it could use the sound I described as “Moist Squish.”
To add the sound right there, click slightly below the timeline in the blank space, and a context menu saying “Add Animation Event” will pop up. Select that option, and it will create a little white square there notifying you there is an event.
When you select that event it turns blue, and there are new options in the inspector. We want to choose “React To Animation Event.”

On the Animator Events tool, we specified that “Moist Squish” was number 1, so to make a moist squish at this specific time, all we need to do here is put a 1 instead of a 0.
You can add as many sounds as you like to the animations, but each one needs a new audio source (for now, anyway. New tools are coming)
Next step: Rendering to Besti X
Quick Navigation
Part 3: Setting up the Besti SDK
Part 4: Exporting your cartoon for Besti
Part 5: Importing your cartoon in Besti
Part 11: Sound Design (You are here)
