
Version 0 (10.0.0 Chahi — BX Core 25)
Welcome to the Besti SDK! This guide is focused on the complete beginner, so if you have some experience, you should find this process to be pretty simple.
Overview
The entire process can be broken down into a few steps:
- Get Unity. The compatible version with Besti is 2021.1.15f1. No other versions of Unity will do, so get that one, specifically. The easiest way is to get it from the Unity Hub. The Unity Hub is a handy way to get specific Unity versions with just a simple link. Once you have it installed, click RIGHT HERE to get the correct version of Unity. VERY IMPORTANT: When it asks you for install options, install the Windows Build IL2CPP option. If you want to make content for Oculus Quest, you must also install the Android tools.
- Get the latest build of Besti Create from the Launcher.
- Set up the Besti SDK Inside the launcher by installing the Besti SDK UnityPackage into Unity.
Step 3 is pretty complicated compared to the others, so let’s break that one down and do it step-by-step.
Setting up Unity as your Besti development environment
Once you’ve installed the correct version of Unity, let’s get it set up properly.
Open the Unity Hub so it looks like this (minus the various projects shown):
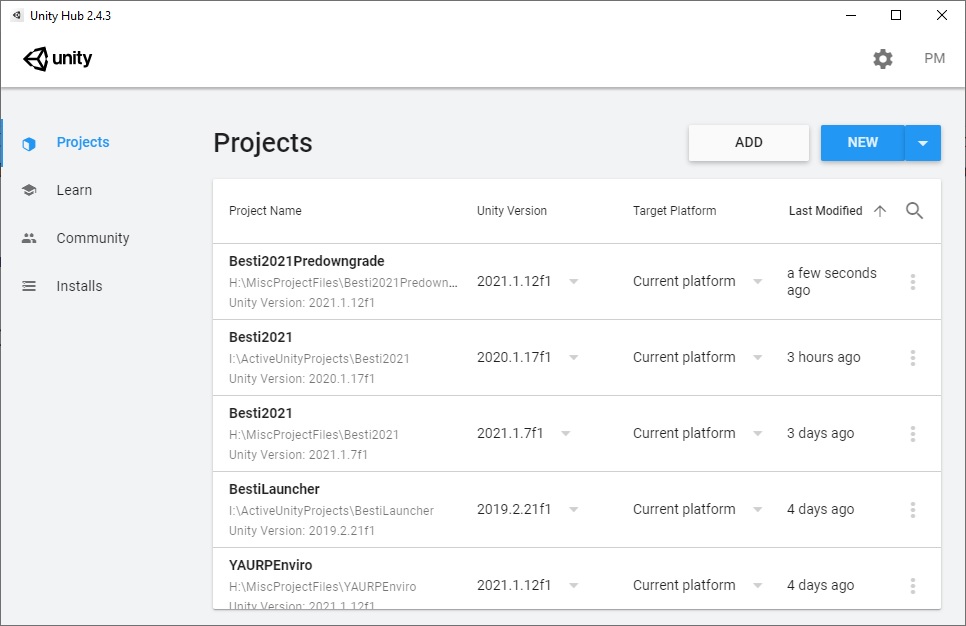
Click the arrow next to “NEW” and choose 2021.1.15f1

A new window will pop up. Click “3D” if it isn’t clicked already, and then name your project. Also decide where the folder should be where your project is located if you don’t like the default. It should look something like this:

Click Create. It will set up your new unity project, which can take a few minutes. When it finishes, you will see a screen like this:

Boom! Welcome to Unity. This is a fresh project. There are other guides that go over how to navigate around, but what we need to do is install the package that will turn this from being a new Unity project into a BestiSDK development project. This is mostly automatic!
When you download the Windows version of Besti Create, in the same folder as the BestiX.exe file is a file that ends with the extension “.unitypackage.” That’s what we want to install into our new Unity project. Navigate to that with a file browser. The version number may differ on yours, but on Besti X Beta 25 (Chahi 10.0.0) it looks like this when we browse to that folder with Explorer:

Set that file browser window aside because we will need the location of the BestiX.exe file if we want to use the new fast testing features. Let’s go back to the Unity project and add a “Custom Package.” Do this by right-clicking on the open space around the icons in the “Project” tab, and choose to add a custom package.

When you choose to import a custom package, a file selection box will pop up. Navigate to the unitypackage distributed with Besti X and choose to open it.

This is a sizeable package so it will take a while to install. The first thing that pops up will look like this:
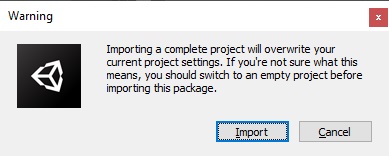
This is a warning that it is going to overwrite your internal settings on Unity to match the required ones for Besti X. If you’re on a fresh project, that’s a good thing. Choose Import. The next window looks like this:
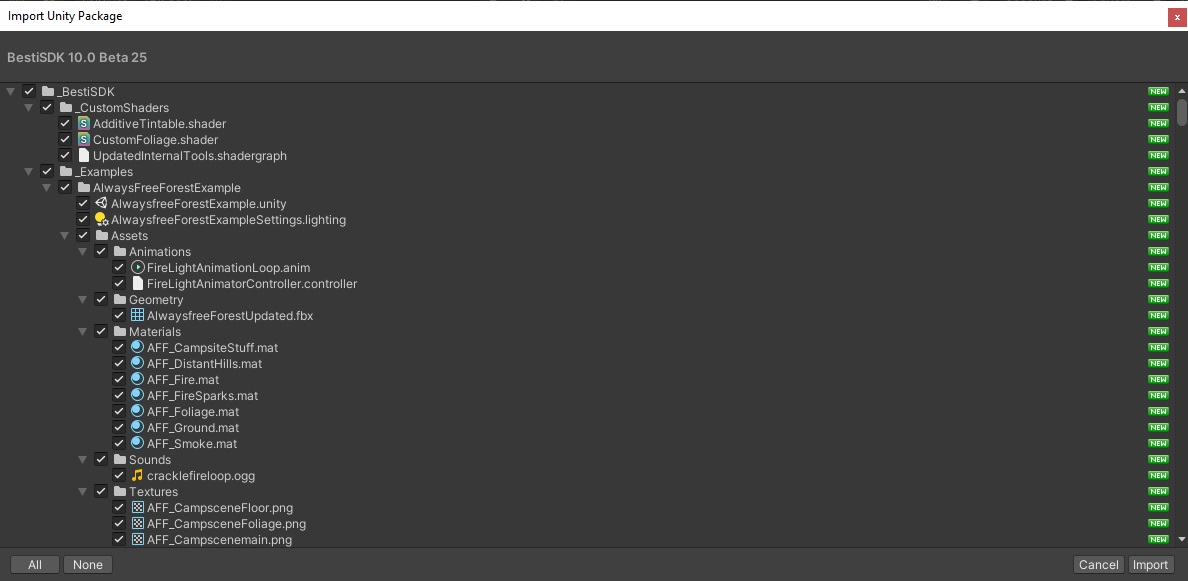
This is a list of every file that will be installed. As this is a new project, everything is “New.” If you’re updating, the symbols might be different but the process is the same. Everything that needs to be changed is selected by default, so hit the “Import” button. It will grind away for a while as it sets everything up.
Once it’s done, you’ll be back at the Unity screen. It may have a couple errors, but that’s Unity in general. Lastly there are a couple manual configuration things you need to do. I tried automating this like everything else but Unity crashes so there’s some bug preventing it from working properly. Just follow along.
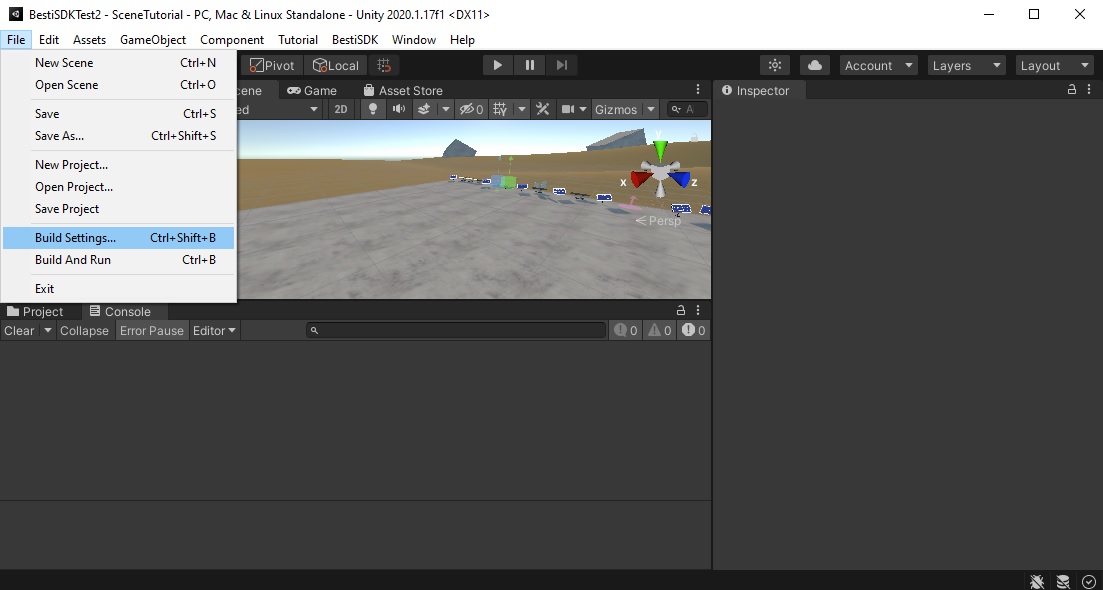
Start by clicking File, then choose Build Settings. This will make a new window pop up.
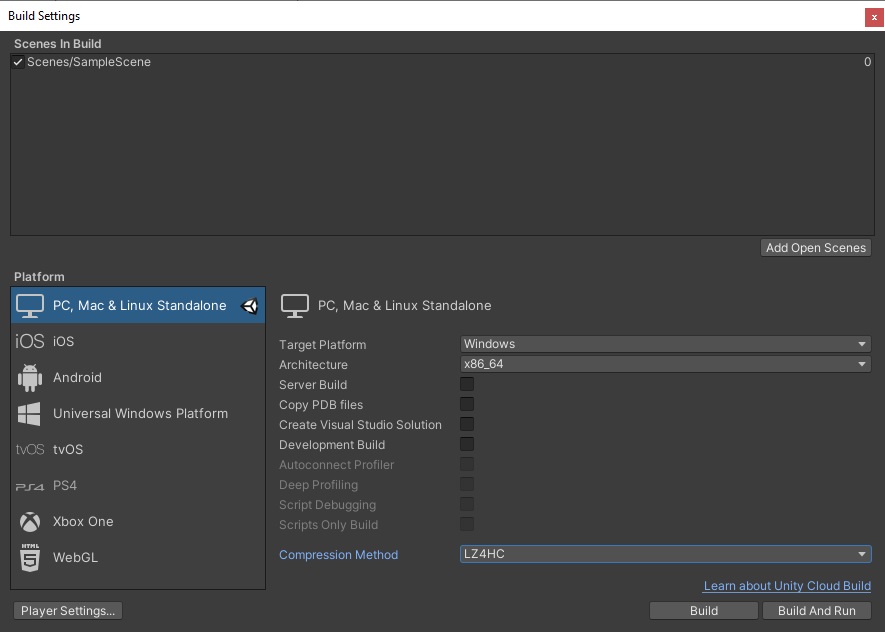
Here you need to make a decision, and that’s to build for either Windows or Oculus Quest. You can make the same content for both, but each must be compiled separately. If you are building for Windows, make it look like the picture above. The Architecture dropdown should be set to x86_64, and the Compression Method dropdown should be set to LZ4HC.

Alternatively, for Quest, make it look like this. Texture Compression should be set to ASTC, and Compression Method should be set for LZ4HC. Press “Switch Platform” after you have made the changes, then wait a few minutes while it reconfigures your materials for the Quest.
Before you do that, wait a moment. You will likely need to test several things in your project and fix a few bugs in Besti. It’s best to make whatever you’re making on PC, first, before switching over to Quest. The reason for this is that PCs can’t run Quest content, so if you compile something for Quest, it will only work on a Quest. On PC, you can verify functionality in 2D and iterate much faster than building for Quest, copying the content onto the quest, starting the game, navigating to it in the menus, etc… On PC, you can test things using the “Compile and Test” function which immediately and quickly opens your content on the PC directly using the default settings.
Regardless of which platform you’re making content for, click the “Player Settings” button. This will open a new window.
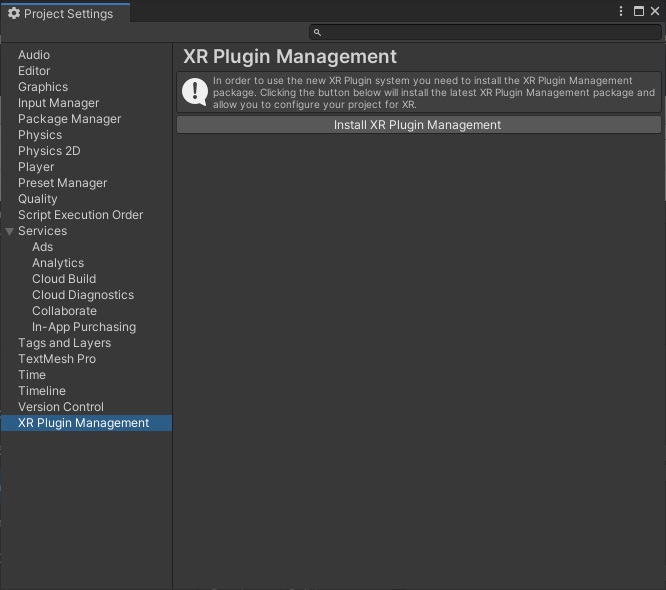
This window has a ton of options, but fortunately, most of them were automatically set earlier. One that just won’t permit itself to be automatically set for whatever reason is the XR Plugin Management system, so let’s manually do it. Even if you don’t have a VR system, you still need to do this because otherwise the content you make won’t be VR compatible. Everything you make will only appear to VR users in their left eye. That’s undesirable and it’s an easy fix. Click “XR Plugin Management” on the left side, then click “Install XR Plugin Management” on the right side. It will take a few minutes, and then the window will change.
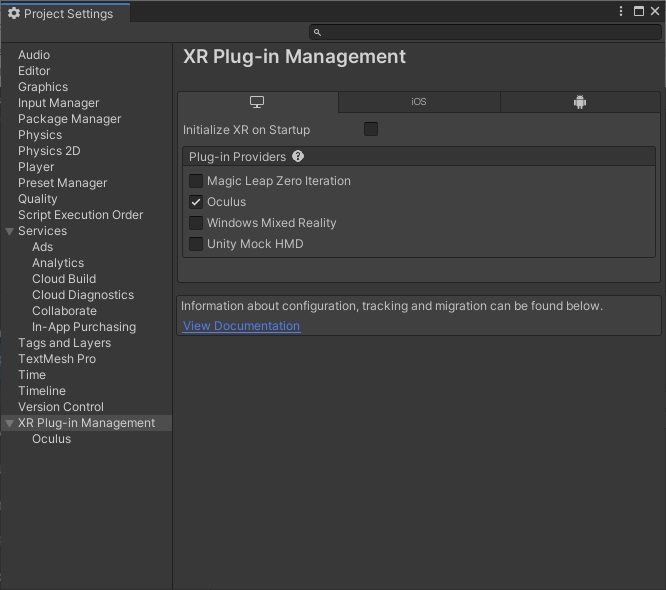
Make your window look like this. Click the “Oculus” checkbox and uncheck the “Initialize XR On Startup” box. This will also enable SteamVR, but by checking Oculus here, we will compile VR-compatible shaders that work on all VR headsets. Click the little Android Symbol so you can adjust those next.
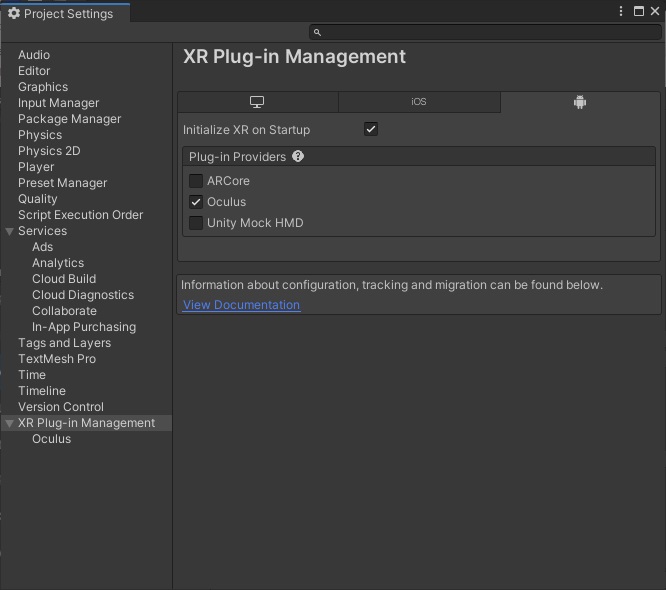
Again, just make it look like this. Choose “Oculus”, and leave the “Initialize XR On Startup” turned on. Next, click the “Oculus” link on the left side.

Change the dropdowns and boxes to look like the above picture. Next click the PC monitor picture on the left side of the right section, and do the final adjustment.

Make your window look like the above picture. Click the X in the upper right corner to close the window and get to work!
You’re now ready to get to work making content!
Why not study the basic controls of Unity, or make your first scene, or perhaps learn some common 3D terms, or get an overview of the Besti SDK, or learn to use a 3D art program so you can make awesome stuff. If you’re brand new to this, you should probably do all of those things!