On to making the scene look good! As of the time of this writing, this section is being worked on extensively in the Besti SDK. It will be updated as soon as the new features are ready to make this process easier, but for now, it’s still pretty easy.
Environments in Besti are called “Scenes” in Unity, and we need to make one to hold our animation. Unless your creation is set in deep space, you probably don’t want to have it take place in a black void.
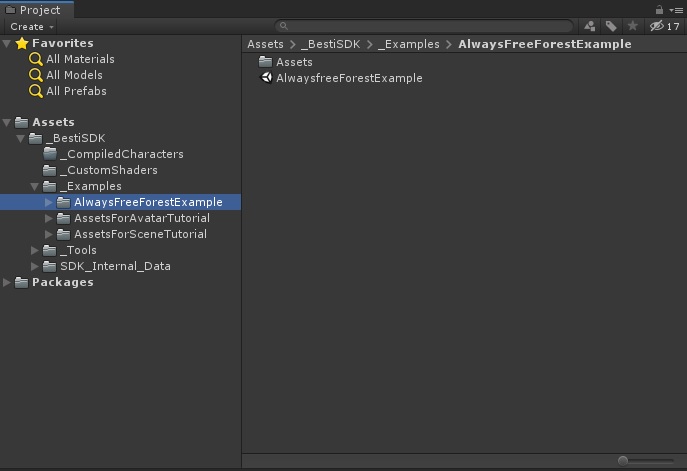
There are a couple built-in scenes in the Besti SDK, so we’ll modify one of those for the sake of the example. In the Project tab, double-click on “AlwaysfreeForestExample” and load up the example nature scene.
This will open up a scene set up like a forest clearing. If you haven’t done the Unity Basics lesson, this would be a good time to do so, but some quick tips:
The “Hierarchy” tab shows a list of all objects in your scene.
The “Scene” tab gives you a camera inside the scene.
- You can look around by pressing and holding the right mouse button and moving the mouse.
- Fly around using the WASD keys while holding down the right mouse button like a first-person game.
- Click on an object in the Hierarchy tab and press F on the keyboard to fly your camera to that object.
The “Inspector” tab gives you information and options for whatever is selected in the Hierarchy tab.
Let’s start by dragging and dropping our FBX file into the scene tab. You’ll notice it snaps to the floor. Don’t worry about positioning this just yet. We’ll do that in a moment. For now we just want it in the scene.
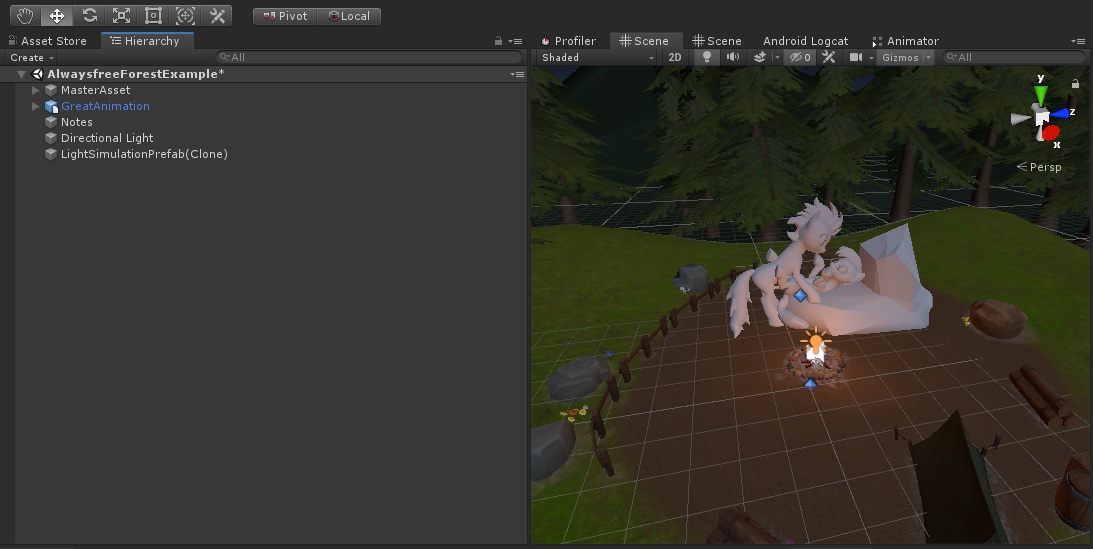
Right away I can see my characters are way too big. I’ll fix that in a moment, but the first thing I want to do is change how they’re organized. I would like my characters to be on one game object, and I would like to separate them into separate packages so my animations can control them separately. This will make the game logic step much easier.
First I’ll create an empty gameobject to act as a placeholder for both characters. I do this by right-clicking in the hierarchy tab and choosing “Create Empty”
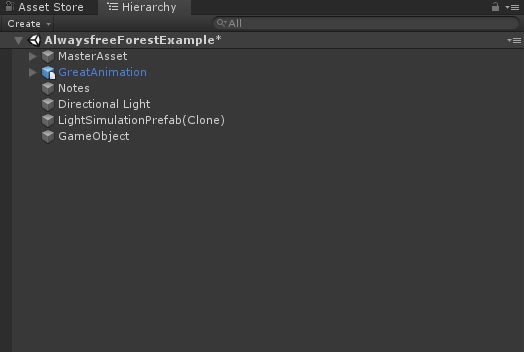
Now I have a gameobject, and I know I want this to hold my animation, so I’m going to name this “My Animation.” Click on it once, wait a moment, then click again to get the option to rename the object. Alternatively, you could click once, then change the name at the top of the Inspector tab.
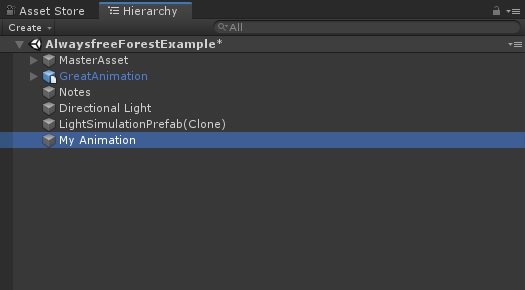
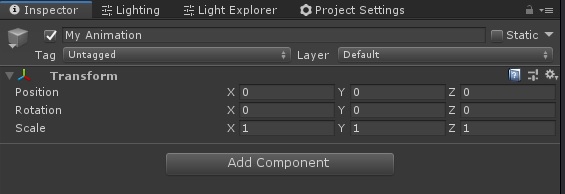
Now I’m going to set this object to be at 0,0,0 in the scene. This will help me position everything later. I do this by clicking on the new object (“My Animation”) in the Hierarchy tab, then I click on the gear icon in the “Transform” part of the inspector tab, and choose “Reset Position” and “Reset Rotation” if it isn’t at position 0,0,0 with the rotation of 0,0,0.
I could also just change the numbers to all say 0 except for scale, which I want to be 1.
I want it to look like this:
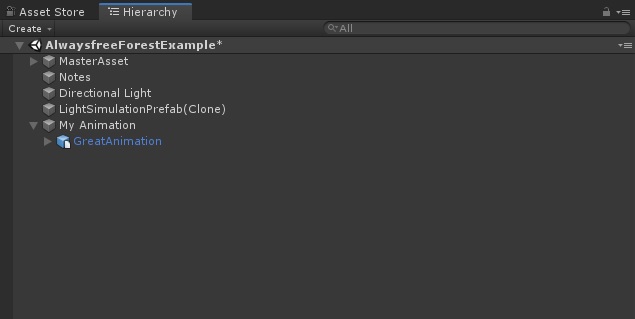
Now I will make my FBX object that I dragged into the scene a child of this object. To do that, I just drag and drop the blue “GreatAnimation” object in the Hierarchy tab onto the new “My Animation” object in the Hierarchy tab.
It should look like this:
Now I want to reset the position and rotation of “GreatAnimation” just like I did with the “My Animation” object. Position should be 0,0,0. Rotation should be 0,0,0, and scale should be 1,1,1. This will move my characters a bit, but that’s what we want.
The benefit of having everything animated in one object is that now we can scale and position the animation as a single thing, instead of needing to reposition everything manually. Because these characters interact with one another, they need to be precisely positioned to have the animation make sense. I will never adjust the individual characters, but I will change the “My Animation” parent object.
I know I need to make everything smaller, and since right now they’re on top of the fire, I’ll move them a bit.
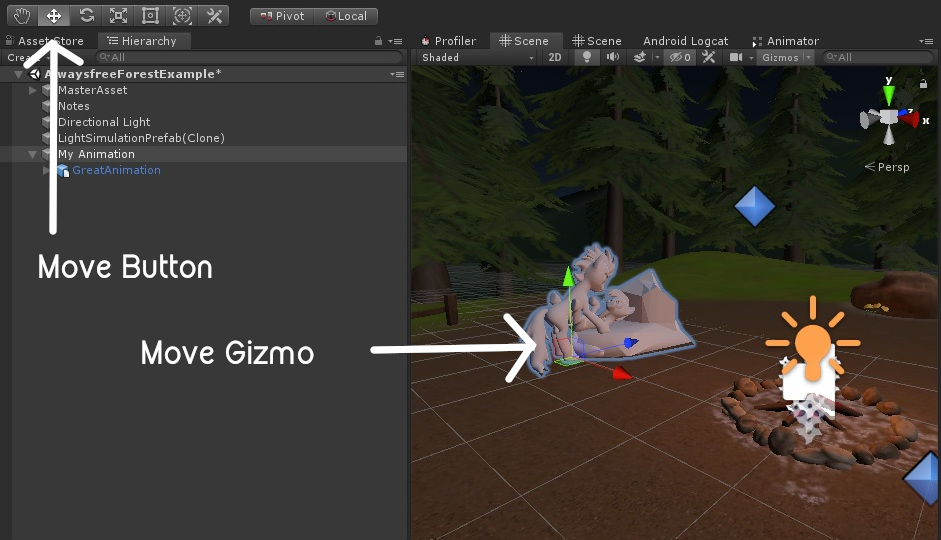
I can move my characters by clicking the move button, then I can scoot the characters around by clicking and dragging on the move gizmo.
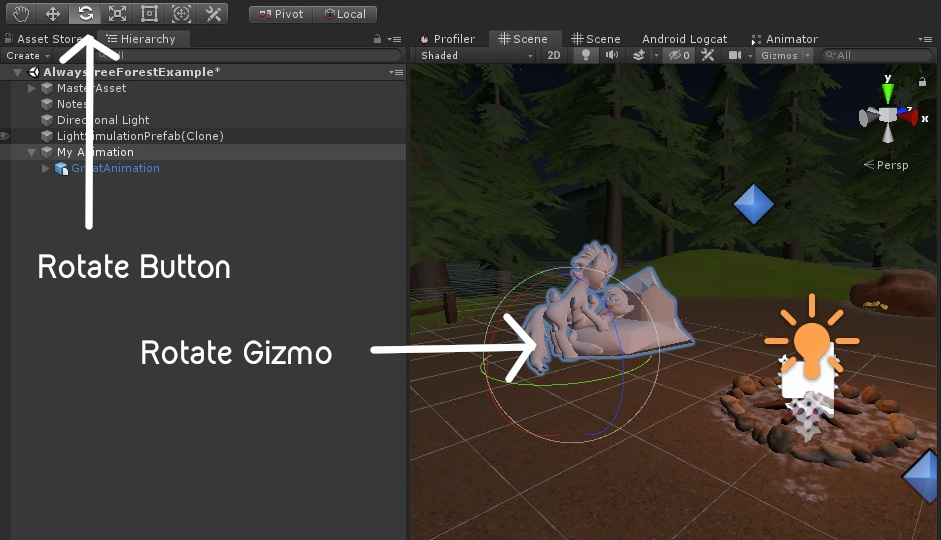
I can rotate the characters by pressing the rotate button, then clicking and dragging on the rotate gizmo.
And I can fix the scale of the characters by clicking the scale button, then clicking clicking and dragging on the scale gizmo.
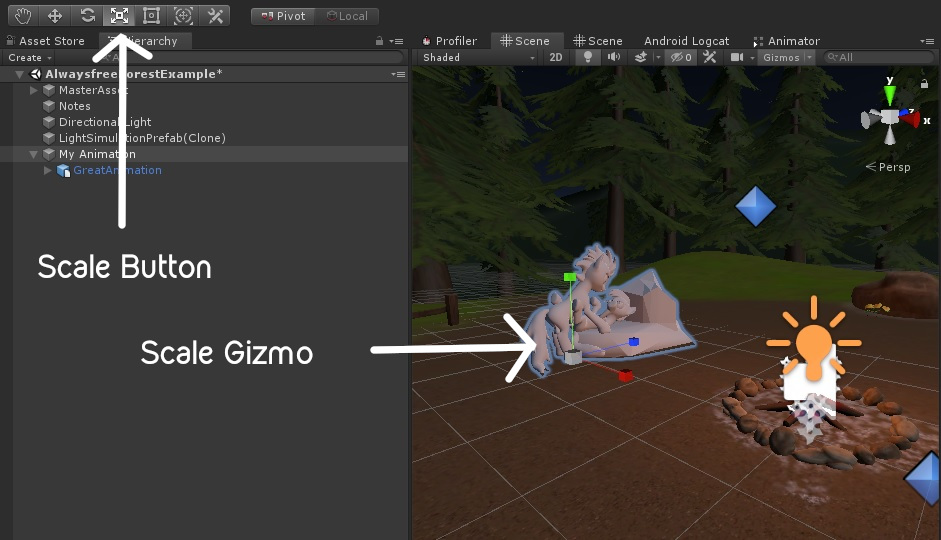
These work just like they do in 3D animation programs, so you should be comfortable with those. If you are following along exactly, I changed the transform of “My Animation” to be like this:

Next let’s organize these characters in the Unity way. Right now, everything is a child of the same game object. We don’t want that.
Let’s start by making the current object in the hierarchy a normal object, instead of a “prefab” object. This is kind of a deeper Unity idea, but we can’t change the hierarchy of a prefab object. We need to change it into a normal object, first.
That’s easy, we just right click the object and choose Unpack Prefab.
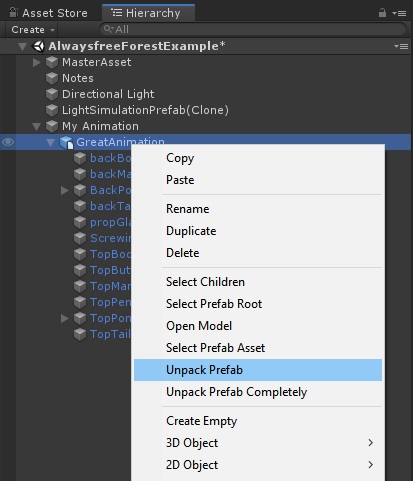
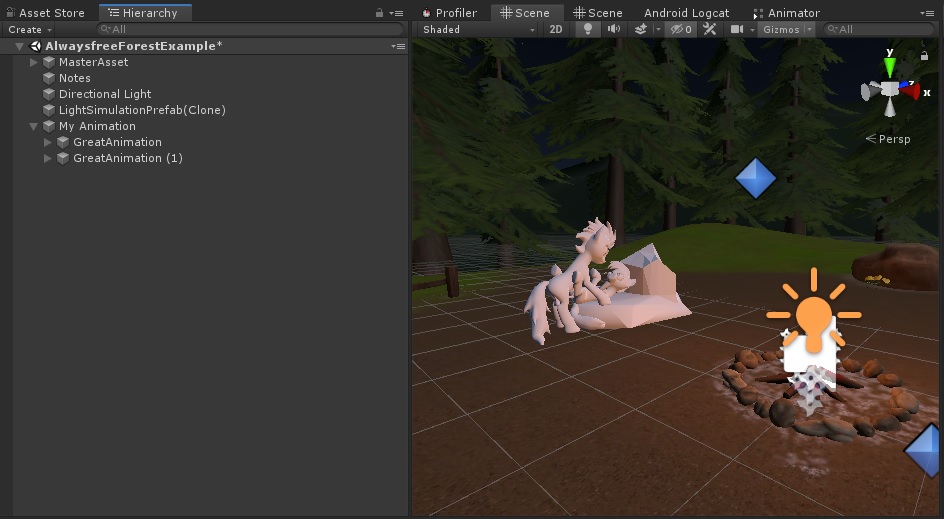
That will change it from blue to white, and now we can reorganize it. Before we do that, let’s duplicate the object so we can create one for the top character, and one for the bottom character.
Choose the FBX object in the hierarchy window that we just unpacked and press CTRL+D on the keyboard.
It should look like this now:
Now I will pick one that will be the top and label it accordingly. I’ll do the same for the bottom. I also brought in a rock object for them to be on top of, so I’ll make an empty object to hold props for my scene. I can do that by right-clicking on the parent object (“My Animation”) and choosing to Create Empty.
It should look like this now:
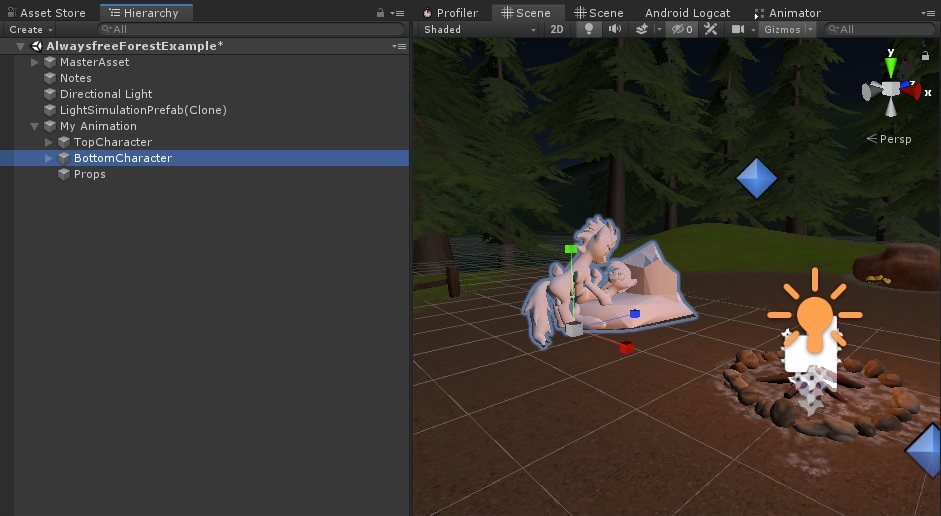
From this point the top character and the bottom character are both identical copies of each other, so what I can do is delete all of the bottom character parts from the top character object, and delete all of the top character parts from the bottom character. I’ll move the rock into the props object.
With everything expanded, it now looks like this:
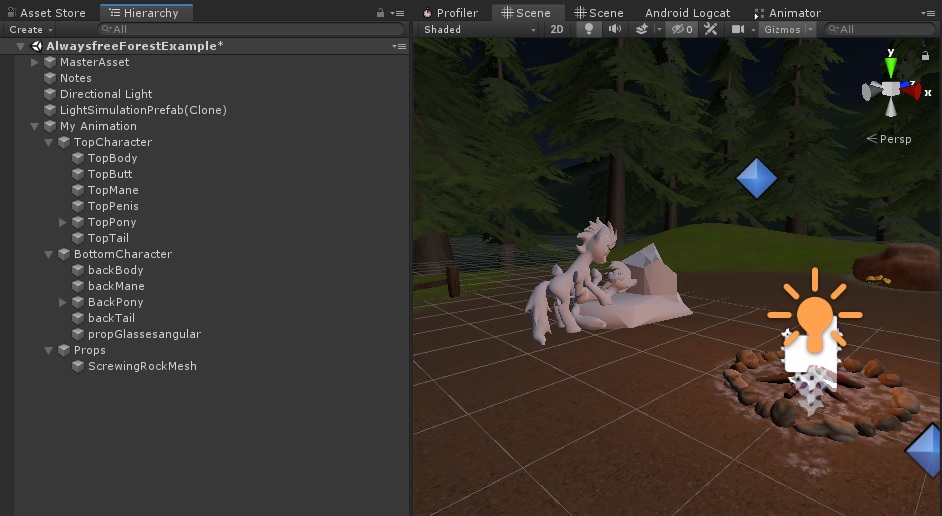
We’re now ready to do the materials and textures, so these characters look like they did in Blender.
Quick Navigation
Part 3: Setting up the Besti SDK
Part 4: Exporting your cartoon for Besti
Part 5: Importing your cartoon in Besti
Part 6: Setting up a scene (You are here)
