Importing into the Besti SDK is pretty simple. Our objective is to import the FBX file as a Unity asset, and then get our animation split into clips instead of being part of one big animation. Of course, if your animation really is just one big animation, you can skip most of this. The example animation I brought in is made of 4 loops and 3 transition animations, and there are two characters. That means at the end of this process I will have 14 animations.
Start by dragging and dropping the FBX file into the Unity “Project” tab. I named my file “GreatAnimation.” In this case I just dragged it into the the Assets folder.
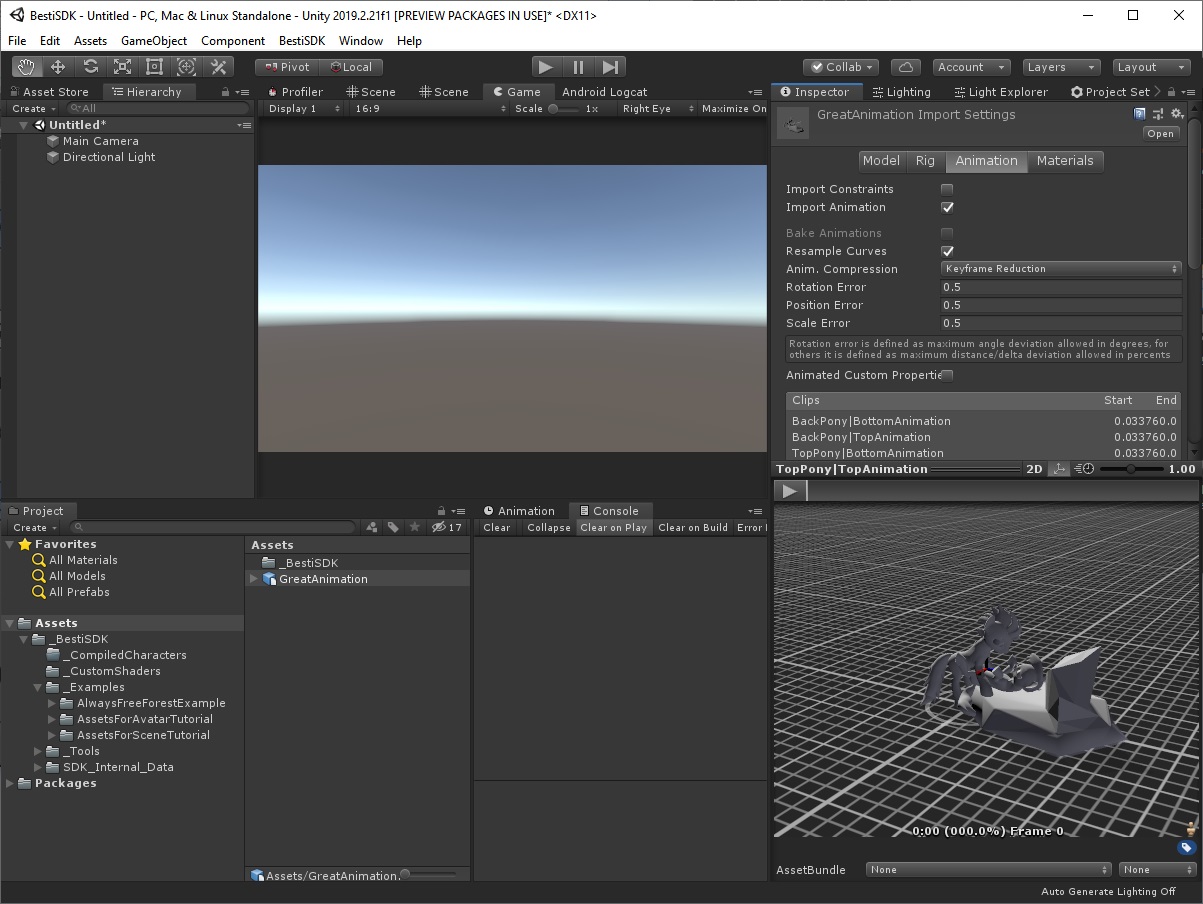
Click the imported animation once in the Project tab. This will change the Inspector tab to be the animation importer. Click the animation tab in the inspector and you should see something like the picture above.
Let’s take a look at the section of the Inspector tab we care about the most:
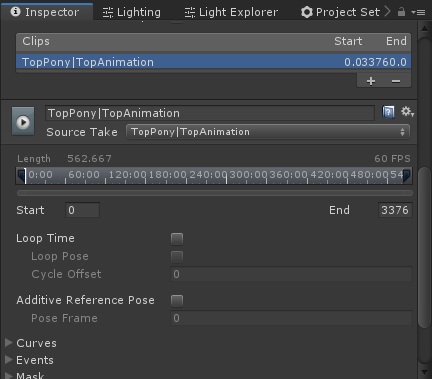
Let’s break down this section so we understand what everything does.
The “Clips” area at the top of the picture are our various animation clips. There are probably some in here by default, but we can ignore those for now. By default the importer will try to figure out some animation clips for you, and these are almost always incorrect. The plus and minus button add or remove new clips.
Below that is the name of the current clip we are working on, followed by the animation source. The top name can be adjusted which will be done as we make new clips, but the “Source Take” dropdown is where we can specify which animation we are working with.
The start and end fields are going to be the frame numbers in our clip that comprise the loop or transition animations.
The Loop Time checkbox should be checked for loops, and left unchecked for transitions.
The Loop Pose checkbox will become active if you choose loop time, and this is designed to make a looping animation work a little better if the start and end frames aren’t quite identical. It makes the start and end poses identical, which doesn’t hurt if you did a good job animating, and does help if you did a somewhat fishy job animating. We will decide later if this should be checked or not.
Everything else you can ignore.
Click the plus button in the clips section to add a new clip.
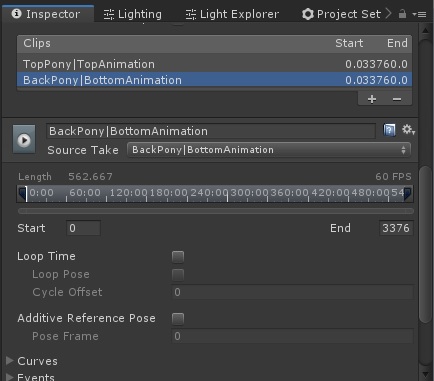
Unity will make a little guess as to what it thinks you’re trying to add, but it isn’t usually correct. We just need to specify what we are working on. Let’s start on the top pony character, and make the first loop of his animation. Let’s name it “Top Pony Loop 1” and press the enter button to save that rename.
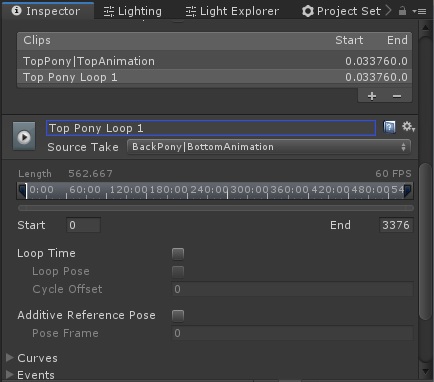
Looking good. Now we need to set the source take. Unity doesn’t actually know which animations apply to which character, but it will let you apply any animation to any 3D model regardless of whether it will work or not. In Blender I named my top pony animation “TopAnimation” and the character “TopPony.”
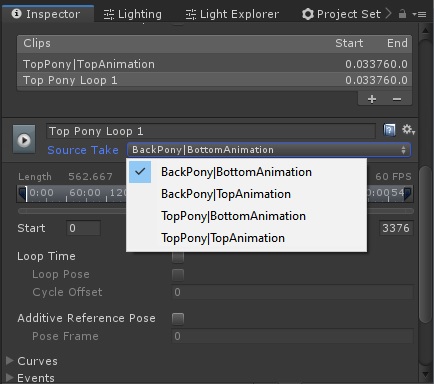
We can see in the list that it has 4 possibilities, but they’re organized in a sensible way. I know I’m working on the top character first, so I want to pick the one that says “TopPony|TopAnimation”
If you didn’t name animations and characters well in Blender, this might be more difficult. Don’t worry though, there’s an easy way to test the animations to see if you’ve picked the right one. Make a guess, and then play the animation in the bottom of the window by pressing the big play button.
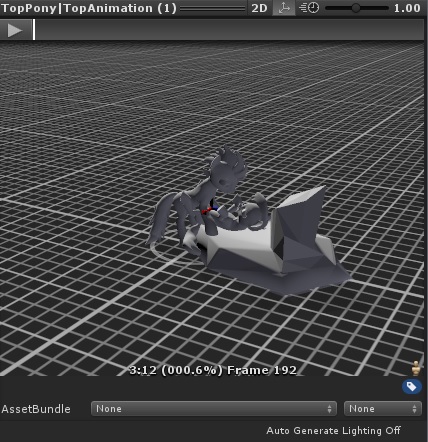
If it doesn’t look incorrect, you’ve found the right one. If it looks crazy or one of the characters disappears, try a different one.
Once you have that we need to trim down this clip to be the exact frames that make the loop or transition animation. This will match what Blender says. I wrote down the frame numbers for the first animation clip, which in my case starts on frame 160 and ends on frame 320. I will specify those numbers as well as ticking the “Loop Time” box, because this is a loop.
Yours should look something like this:
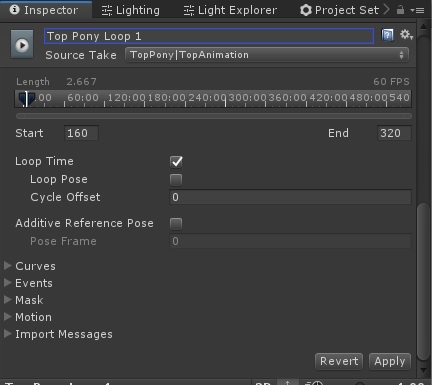
Now we may need to make some adjustments. Push the play button near the preview and watch how it loops on itself. If you put the real end frame (so, the frame that is identical to the first frame) on “End” you want to check the Loop Pose button so that frame isn’t duplicated when playing back your animation. If you subtract a single frame from the end of the animation as you would in a 3D application, you probably do not.
This is up to you and the results are almost identical, but in general, I put the real final frame on “End” and then tick the Loop Pose box. Your best bet is to test it both ways and see which one looks best to you.
When you’re satisfied, just repeat the process for every animation, remembering to specify when an animation is a loop or not.
After adding all my animations for each character, this is what my clip section looks like:
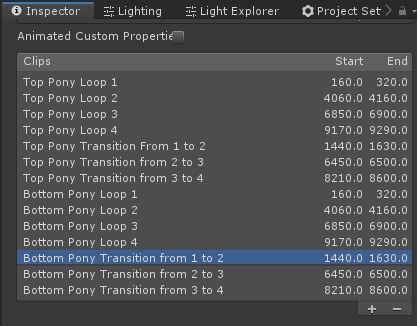
The top and bottom characters both have identical sets of animations, and they’re labeled clearly. It’s worthwhile to label your creations well, so the different parts can be easily identified.
Make sure if you have multiple characters with identical animations like this that the frame numbers are completely identical, and double-check everything so you can catch any mistakes. See how “Top Pony Loop 1” and “Bottom Pony Loop 1” have the same numbers? If there’s even a single frame difference, the characters will get out of sync with one another when we set up the game logic. A little extra time here will save you time troubleshooting a mystery, later.
Once you’re done, hit the apply button. This can take a few minutes, but when you’re done each animation clip will be a separate file hidden inside the FBX file that you imported (see it by clicking the little triangle next to the name in the Project tab.)
So we can make minor adjustments later, it is a good idea to duplicate the animation clips. Animations inside of an FBX are read only in Unity, so to enable write access, we just need to make a copy. This will also let us make minor changes to the 3D model and not need to re-import all of the animations again. As long as the bones have the same names and order, you can re-use an animation clip.
To do that, click the triangle to unpack the FBX file you’ve been working on, then highlight each of the animation clips you made by clicking on them while holding down CTRL on the keyboard. If they’re all in a row, you can click the top one, hold down shift, and then click the bottom one which will highlight everything in between.
Once they’re highlighted, press CTRL+D on the keyboard to duplicate them. All of the clips will be dumped into the same directory as the imported FBX, except this time, they’re read/write instead of read only.
Your project window should look something like this:
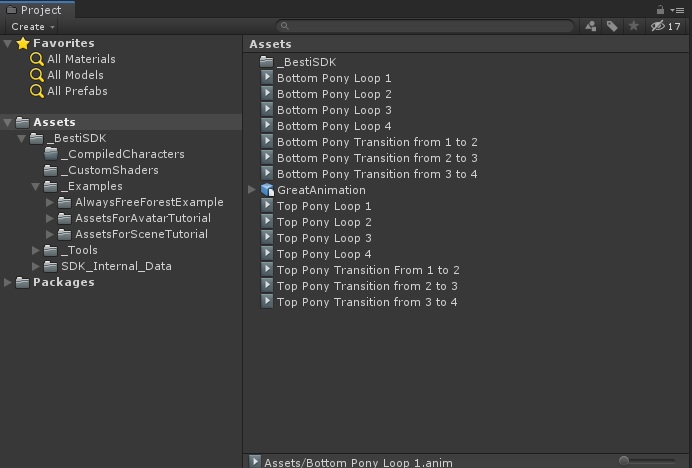
That’s it! We’re all imported, so let’s make this look nice!
Important: Sometimes, especially if you import a file from an older version of Blender, you’ll find that things don’t quite import right. You can manually edit animations in Unity using the “Animation” tab. Check Youtube for how to animate directly in Unity if that’s something you want or need to do. This was made in Blender 2.77 which has a glitchy exporter, so I had to edit my animations slightly. Edited versions of these animations are available in the Besti SDK in _Examples –> ConvertAnimationToVRGame –> Pony Character Animations
Quick Navigation
Part 3: Setting up the Besti SDK
Part 4: Exporting your cartoon for Besti
Part 5: Importing your cartoon in Besti (You are here)
